
Original Image !!
1st Stage – Is to get an image of the internet in colour so you can rid of the colour pigments by turning it into black and white Image which works more effectively as is exposures the image for when using the machine(big light box) in screen printing. It will just pick up the black ,white tone in the image !!

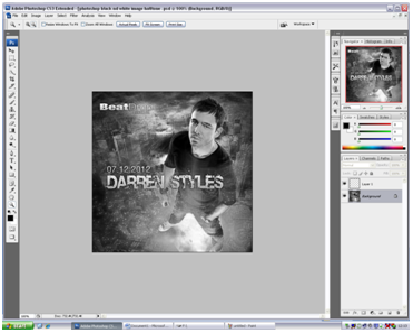
So you open up Photoshop open the picture in your folder and then you want to open a new layer so you can easily change things without disrupting the others. So this will be in the right hand corner of the screen but not necessarily need for this!!

So here you go to image- adjustments- de saturate so turning it into a grey image ... showed below !! …. So here I have showed the tools where to turn it into a grey scale.
So here the image converts this into a grey scale image from a colour image. This takes away the colour by turning it into grey scale but are composed of grey shades to a black and white image which eliminates it getting rid of any colour. This won't be good to use for screen printing as it is a dull gritty grey and when you screen cooks it won't give you any detail it won't be done properly. It's best to have a black and white image with full intenstity so it will actually work on the acetate when doing your design .

So here you go to image adjustments – levels you will get this histogram and you can change the dials by increasing and decreasing it to a reasonable specific shade so threshold by getting rid of any greys and keeping it to black and white making it darker or a lower shade . You want to try not to lose any detail within the image because it won't show on the mesh screen when it is cooking your screen and when your putting the medium(ink on when your coating your image with the ink .

Here you would want to take this image to reprographics so you can get in photo copied by the term transparent or known as onto acetate for ready for screen printing on the big machine (light box).
I went to image mode grey-scale - flatten the image as it puts it into a bitmap file so it's individually separated as an image then you press discard
This image had to be flattened because it brings all the layers together in one. If you don't then it be just a document file. Which would be a very large file to format.

Here for the other stage above; you go to image bitmap - then click halftone, which is a file of an image of a format it's used to store digital images .

Then you click on to image - mode - go to Bitmap and the method you want to keep it to is half a tone as you want this method to work effective when screen printing keeping the detail without disorientating it to much. But here you can’t see the dots as the pixels are as small as they won’t work effectively as it will not show the detail when cooking and when you do your design. Here you want in a good theshold image keeping the detai lwithout losing it .
Here it will them come up with the half tone box you want to change the frequency to 15 so you can actually see the bigger dots as it will work more effective when cooking and screen printing. It will pick up the threshold pigment … So the angle I changed was 53 - 48 I changed this to 15 and I changed the shape from a diamond to a round shape. You keep the angle to 45 degrees!!


When screen printing the image needs to be black and white as this is a form of postitive film which will work effectively when it is being cooked .
It gets rid of any shadows and colour with the grey scale this another method of halftone then you convert into a bitmap which is the picture image .

Black and White image no colour

Here is the original image!!

Here you can see the dots are so big .... So it will work more effectively …. This is a large exposure of an image which will pick up these lighter and darker tones of the black and white and will be hopefully successful outcome after cooking it and washing the emulsion off the mesh screen. Before you could hardly see the dots as it wouldn't work properly as it would probably smudge the ink and would ruin the image on the board.

Here is another image I did with the same step by step guide but just with a different image …. See the big dots as it will work =)Here you can control the greys, whites, blacks tone by turning down the pixels. Here you can see the big dots which will work well when screen printing because you need the holes for a good outcome when you’re using the medium and the squeegee which you put the medium on and in one movement you scroll it up slowly which will catch the whole of the image. Here it shows a half tone colour as it shows with all the blacks and the whites of a threshold with removing the colour with showing the image in a transparent form of colour after it has been cooked on the mesh screen.
Halftones - It is essential to use halftones when you want to screen print an image because you need to give it that pure solid colour to block out any light and burn your screen right =) Changing your gradients into halftone allows you to create a visual appearance where it blocks the light away . Halftones are then done properly as there only visible. The screen printing needs to be black and white as this is a form of postitive film which will work effectively when it is being cooked .
Halftones - It is essential to use halftones when you want to screen print an image because you need to give it that pure solid colour to block out any light and burn your screen right =) Changing your gradients into halftone allows you to create a visual appearance where it blocks the light away . Halftones are then done properly as there only visible. The screen printing needs to be black and white as this is a form of postitive film which will work effectively when it is being cooked .

Here is the image in black and white …. Threshold getting rid of the pigment colours!!

Here is the original image …..

Threshold black and white here you can see the big circles!! Definitely will work for screen printing!!
When screen printing the image needs to be black and white as this is a form of postitive film which will work effectively when it is being cooked .
It gets rid of any shadows and colour with the grey scale this another method of halftone then you convert into a bitmap which is the picture image .

Black and White image no colour

Here is the original image!!
No comments:
Post a Comment